Feeds:
Posts
Comments

Archive for the ‘Borrowed Recipes’ Category


The weather in Boston has been unseasonably warm these past few weeks, with the exception of a few days here and there, including this weekend. I cannot say that I miss the biting cold, chapped hands, and red, runny noses. However, the onset of icy winds makes a fine excuse to stay inside, curled up in front of the TV, with a steaming bowl of soup and a good book.

I found this recipe for Sweet Potato, Corn, and Jalapeño Bisque from the New York Times by way of The Wednesday Chef several years ago. I’ve since made it at least a couple dozen times. This soup takes under 30 minutes to make, is wallet-friendly, and makes the perfect take-to-work lunch or quick after-work dinner.


Sweet Potato, Corn, and Jalapeño Bisque

adapted from NY Times

1 tablespoon peanut oil

1/2 cup chopped onions

2 teaspoons minced garlic

3 medium sweet potatoes (about 2 1/2 pounds total), peeled and cut into 1-inch cubes

4 cups vegetable or chicken stock (Homemade or Better than Bouillon) (You can also make this vegan with vegetable stock)

1 medium jalapeño, seeded and finely chopped

1 cup fresh or frozen corn kernels

2 tablespoons molasses

kosher salt to taste

1/4 teaspoon ground cayenne

Black pepper to taste

Tiny pinch of ground cinnamon

Finely chopped scallions, green parts only.

1. Heat peanut oil over medium heat in a large heavy soup pot. Add the onions and garlic and sauté until translucent (about 3 minutes). Add stock and the sweet potato chunks and bring to a boil.

2. Reduce heat to a simmer, and cook until the potatoes are done (about 10-13 minutes). Purée sweet potato mixture using an immersion blender until smooth (you can also use a blender or food processor, working in batches).

3. Put soup over medium-low heat and stir in molasses, salt, pepper, cayenne, cinnamon, molasses, jalapeño, and corn. Heat until corn is warmed through. If you like a thinner soup you may add a little more stock and heat through.

4. Serve topped with scallions or chives.

Read Full Post »

I completely forgot to post Barefoot Bloggers’ recipe for Herb-Roasted Onions chosen by Kelly from Baking with the Boys. I dont’ particularly care for onions unless they are in something else, so I have to go off of my guinea pigs’ responses. Supposedly two-thumbs up.

Click here for the recipe.

Read Full Post »

When I made this Beef Bourguignon a few days ago it was one of those disastrous days in the kitchen. We’ve all had them: you burn yourself (in my case my right and left hands in separate incidents); you spill stuff (a canister of sugar and then water on my camera which, by the grace of God survived); and the recipe you are making just doesn’t want to cooperate. Being the klutz I am the spills and burns came as no surprise, but having one of Ina Garten’s recipes fail on me was just down right shocking.

The directions called for a few minutes on the stove top before an hour long trip into a low oven. After the requisite 75 minutes, I removed the Bourguignon from the oven, and while I knew the cooking time was on the short-side for chuck, I was expecting moist, tender, melt-in-your mouth cubes of beef. After all, this was an Ina recipe. But instead of a dish with juicy chunks of beef in a complex and flavorful wine sauce, I was met with wine soup studded with tough, chewy, pieces of meat. It tasted like it was destined for the dog bowl. Could this be? Had one of Ina’s recipes failed me? I could not resign myself to such a harsh reality so I wrangled the pot back onto the stove top (with my right hand, which wasn’t burned quite as bad) and let it simmer over ultra low heat for another three hours. After a day where everything went wrong, I thought the Bourguignon was doomed. But no, three hours later, the beef was perfectly tender and delicious.

Beef Bourguignon
Adapted from Ina Garten

  • 1 tablespoon good olive oil
  • 8 ounces dry cured center cut applewood smoked bacon, diced
  • 2 1/2 pounds chuck beef cut into 1-inch cubes
  • Kosher salt
  • Freshly ground black pepper
  • 1 pound carrots, sliced diagonally into 1-inch chunks
  • 2 yellow onions, sliced
  • 2 tsp. chopped garlic (2 cloves)
  • 1/2 cup Cognac
  • 1 (750 ml.) bottle good dry red wine such as Cote du Rhone or Pinot Noir
  • 1 tablespoon tomato paste
  • 1 teaspoon fresh thyme leaves (1/2 teaspoon dried)
  • 2 tsp. butter
  • 1 pound frozen whole onions
  • 1 pound fresh mushrooms stems discarded, caps thickly sliced

Directions

  1. Preheat the oven to 250 degrees F.
  2. Heat the olive oil in a large Dutch oven. Add the bacon and cook over medium heat for 10 minutes, stirring occasionally, until the bacon is lightly browned. Remove the bacon with a slotted spoon to a large plate.
  3. Dry the beef cubes with paper towels and then sprinkle them with salt and pepper. In batches in single layers, sear the beef in the hot oil for 3 to 5 minutes, turning to brown on all sides. Remove the seared cubes to the plate with the bacon and continue searing until all the beef is browned. Set aside.
  4. Toss the carrots, and onions, 1 tablespoon of salt and 2 teaspoons of pepper in the fat in the pan and cook for 10 to 15 minutes, stirring occasionally, until the onions are lightly browned. Add the garlic and cook for 1 more minute. Add the Cognac, stand back, and ignite with a match to burn off the alcohol. Put the meat and bacon back into the pot with the juices. Add the bottle of wine plus enough water to almost cover the meat. Add the tomato paste and thyme. Bring to a simmer, cover the pot with a tight-fitting lid and place it in the oven for 3-4 hours or until the meat and vegetables are very tender when pierced with a fork.
  5. Add the frozen onions. Saute the mushrooms in 2 tablespoons of butter for 10 minutes until lightly browned and then add to the stew. Bring the stew to a boil, then lower the heat and simmer for 15 minutes. Season to taste.

Read Full Post »

I was just dying to make macaroni and cheese last week. There is something about cold weather and having to retire my flip flops and gauzy tops (ok, they should have been retired long ago) in favor of fleece hoodies and drawstring sweats that makes me crave pasta, butter, and cheese. Unfortunately for me, I had some deliciously tempting but not-as-much-craved-for shrimp and beef in the fridge. Well, I did have two delicious meals, but really, I just couldn’t plow through those perishables quick enough to get to mac and cheese.

I dug my nose into Foodgawker, Tastespotting, and some of my favorite food blogs in search of a fail-proof recipe. Well, I was a little overwhelmed and confused. Everyone seems to have their own protocol. Cold roux with warm milk; warm milk with cold roux; warm roux with warm milk; to preboil or not preboil; Velveeta as a stabilizer; American as a stabilizer; the decisions were endless. I threw up my hands in disgust and did what I always do when I am overwhelmed – turn to Ina.

I could just sing Ina’s praises all day long. Her recipes are always simple, easy to follow, and delicious. This recipe was no different.

Mac and Cheese
Adapted from

  • Kosher salt
  • Olive Oil
  • 1 lb. whole-wheat elbow pasta
  • 2 c. low-fat milk
  • 1 c. cream
  • 4 Tb. butter
  • ½ c. all-purpose flour
  • 2 c. grated Swiss cheese
  • 2 c. grated cheddar
  • ½ tsp. pepper
  • ½ tsp. nutmeg
  • ½ c. Italian breadcrumbs

Directions

  1. Preheat the oven to 375 degrees F.
  2. Drizzle oil into a large pot of boiling salted water. Add the macaroni and cook according to the directions on the package, 6 to 8 minutes. Drain well.
  3. Meanwhile, heat the milk and cream in a small saucepan, but don’t boil it. Melt 6 tablespoons of butter in a large (4-quart) pot and add the flour. Cook over low heat for 2 minutes, stirring with a whisk. While whisking, add the hot milk and cream and cook for a minute or two more, until thickened and smooth. Off the heat, add the Swiss, Cheddar, 1 tablespoon salt, pepper, and nutmeg. Add the cooked macaroni and stir well. Pour into a 3-quart baking dish.
  4. Top with breadcrumbs bake for 30 to 35 minutes, or until the sauce is bubbly and the macaroni is browned on the top.

Read Full Post »

Whole Wheat Pitas

Perhaps I am naive, but I had always thought pitas got their characteristic pouch by placing one solid round atop another and then pressing them together just around the edges (like an empty ravioli maybe?). It’s not that I had given too much thought to the process, but it wasn’t until I saw the puffed pitas baking in the oven on The Kitchen Sink that I realized this bread was the result of cooking wizardry.

Though there are several steps, the recipe is quite easy to follow. Step one is to proof the yeast. Then, a portion of the flour is mixed in and rested until doubled in bulk.

The remaining flour is mixed in and then the dough is kneaded for about 10 minutes before resting for an hour, or until doubled in bulk.

Next, the dough is punched down and divided into eight balls. Each ball is rolled out into a 7″ round and placed on a baking sheet. Yet again, the dough must rest.

After 30 minutes, the rounds are ready to be baked in a 500 degree oven. After two minutes on one side, they are flipped and allowed to cook for just another minute. You really need to watch the clock though. I think my first batch stayed in just one minute extra and the result wasn’t a bread, it was a chip (don’t worry, they still got consumed with my favorite spicy hummus).

(Sorry photo is blurry. I was rushing so the heat wouldn’t escape!)

I don’t think I will ever buy store bought pitas again.  Oh wait, you would like to know what the glorious mixture is spilling out of the pita in the top photo? That, dear reader, is my Southwest Chicken Salad. I will tell you how to make it if you come back tomorrow!

Whole Wheat Pita Bread
Gourmet found via The Kitchen Sink

Ingredients

  • 1 (¼-oz) package active dry yeast (2 1/2 teaspoons)
  • 1 teaspoon honey
  • 1¼ cups warm water
  • 2 c. bread flour
  • 1 cup whole-wheat flour
  • ¼ cup extra-virgin olive oil
  • 1 tsp. salt
  • Cornmeal for sprinkling baking sheets

Directions

  1. Stir together yeast, honey, and 1/2 cup warm water in a large bowl, then let stand until foamy, about 5 minutes. (If mixture doesn’t foam, discard and start over with new yeast.)
  2. While yeast mixture stands, stir together flours in another bowl. Whisk 1/2 cup flour mixture into yeast mixture until smooth, then cover with plastic wrap and let stand in a draft-free place at warm room temperature until doubled in bulk and bubbly, about 45 minutes. Stir in oil, salt, remaining 3/4 cup warm water, and remaining 2 1/2 cups flour mixture until a dough forms.
  3. Turn out dough onto a floured surface and knead, working in just enough additional flour to keep dough from sticking, until dough is smooth and elastic, 8 to 10 minutes. Form dough into a ball and put in an oiled large bowl, turning to coat. Cover bowl with plastic wrap and let dough rise in draft-free place at warm room temperature until doubled in bulk, about 1 hour.
  4. Punch down dough and cut into 8 pieces. Form each piece into a ball. Flatten 1 ball, then roll out into a 6 1/2- to 7-inch round on floured surface with a floured rolling pin. Transfer round to 1 of 2 baking sheets lightly sprinkled with cornmeal. Make 7 more rounds in same manner, arranging them on baking sheets. Loosely cover pitas with 2 clean kitchen towels (not terry cloth) and let stand at room temperature 30 minutes.
  5. Set oven rack in lower third of oven and remove other racks. Preheat oven to 500°F.
  6. Transfer 4 pitas, 1 at a time, directly onto oven rack. Bake until just puffed and pale golden, about 2 minutes. Turn over with tongs and bake 1 minute more. Cool pitas on a cooling rack 2 minutes, then stack and wrap loosely in a kitchen towel to keep pitas warm. Bake remaining 4 pitas in same manner. Serve warm.

Read Full Post »

Please excuse me for my lack of posting. It’s been sort of a whirlwind weekend. I also flaked out on yesterday’s post with Tuesdays With Dorie (next week, I promise). You see, Saturday I got some news. After waiting over three months (96 agonizing days), I finally (finally!) received a little white envelope in the mail from the Massachusetts Board of Bar Examiners… I PASSED THE BAR!!! This means I am now officially a lawyer, albeit an unemployed lawyer, but capable of practicing no less! I finally put the “(e)squire” into “Chefsquire.” There are no words to describe how big of a weight that has been lifted off of my shoulders. As you can imagine, this weekend I did a lot of celebrating, relaxing, and gloating, though not much cooking.

Ok, enough patting myself on the back. Unless you are trolling food blogs in search of a middle of the pack law school grad now licensed in Massachusetts to hire at your firm, you are here for the food. I have several wonderful dishes in my to-blog-about queue, so check back daily! Today, I will tempt you with these delectable Pumpkin Chocolate Chip Cookies.

Read on for more photos and the recipe. I promise no more bragging!

(more…)

Read Full Post »

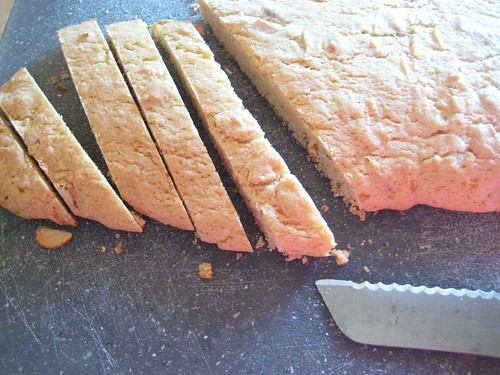
I have had this biscotti recipe bookmarked for a few weeks and after awakening with a hankering for chocolate and almonds, I thought today they perfect day to try it.

I followed the original recipe to a tee (with the exception of a dip in chocolate), and there was not one thing I would have changed. As the recipe’s original creator describes, her cookie is a “hole in one.” This biscotti combines the perfect proportions of orange, almonds, and vanilla. I debated adding a hint of almond extract but I restrained myself; too often I succumb to my temptations and the results fall into the “too much of a good thing” category. Without the almond extract there is still plenty of almond flavor and enough room to allow the other flavors to shine through. The aroma as I mixed the wet ingredients was heavenly and my whole home smelled of citrus and vanilla as the cookies had their first visit to the oven.

One hint I would like to add, that is not in the recipe, is that the cookies will not yet have their characteristic crunch when removed from the oven after the second bake. Don’t worry, be patient, they will harden a bit as they cool. I don’t want you to have a repeat of my Christmas five or so years ago, the first time I made biscotti. I thought they would be completely crunchy when removed from the oven and, lets just say, Santa lost a tooth and didn’t leave me much under the tree.

Anyhow, back to these biscotti. After the second bake I was unable to exercise restraint (I told you I have a problem with this), and melted up some Ghirardelli. About one-third of the biscotti were left naked; another third were given just a drizzle of chocolate; and another third was dipped cut-side down in a puddle of chocolate. This was not too much of a good thing, in fact, it was a rather delectable finishing touch.

This is an absolutely wonderful biscotti recipe I am sure I will make again and again. Please click here to see the original recipe (redirects to Smitten Kitchen).

Read Full Post »

I didn’t have an iPod was until only a year or two ago; I saw The Goonies for the first time while in college; I am still using a crappy P & S camera; and I had no idea Miley Cyrus was dating a Jonas Brother. So yes, one might say I am behind the times, if not completely and utterly clueless. For that very same reason I lost years of culinary adventures by not discovering food blogs until month or two ago. It comes as no surprise that I just now (finally) discovered No-Knead Bread from the New York Times. How did I miss such earth shattering news?

Well, better late than never. Yeast breads have been somewhat of a stumbling block for me… let’s just say recent forays into bagel making are a sore spot not to be blogged about. This bread is an exception. If you are one of the tragically un-hip and not-in-the know, kindly go to your pantry and grab yeast, flour, and salt. Just mix it with some water, come back to it tomorrow, and then bake at 500 degrees in a cast iron dutch oven. If you are still lusting after a Le Creuset like me, just bake it in your stainless Emerilware stock pot on sale from QVC. Works fine. So what are you waiting for, go to this link and make the bread – all the cool kids are doing it (er, were doing it 2 years ago).

Dough after resting 12 hours (rested another 4)Dough before final 2-hour rest
Ready to BakeThe bread has a dark, crispy crust and a light, airy crumb

Read Full Post »

This is my first post with Tuesdays with Dorie. TwD is a blogging group which picks 4 recipes per month from Dorie Greenspan’s book Baking: From My Kitchen to Yours. I have had Greenspan’s book for a whole year and have yet to make anything from it, though many recipes are bookmarked. I thought this group would motivate me to crack it open and get cooking.

Unfortunately, this first recipe just didn’t impress me. I now realize that many TwD members post about their experiences as they make the recipe before actually posting in their blogs (which must be on Tuesday). I wish I had known that before because perhaps I could have prevented the dry result of these cupcakes. I was eager with anticipation before cooking the batter. I sneaked a taste of the batter before cooking and it was so light and perfectly sweet and chocolatey. I wish I could say the same about the cupcakes when pulled from the oven. I thought they were dry and lacked the rich chocolate flavor I was expecting. Next week we are making a dessert I have never tried, rugelach.

Read Full Post »

This is my first post with the Barefoot Bloggers, a group that posts twice a month on their experiences with pre-selected recipes from Ina Garten. While I will always have my Ina cookbooks, I am thrilled she just signed on for another season of FN. Now amid the round-the-clock coverage of Rachel Ray, junk food, and Guy Fieri, I still will have my 30 minutes of solace M-F 5-5:30 (thank you, God).

Anyways, below is the recipe, as I made it. I did make a few changes and if you wish to see the original recipe, please click here. I basically halved the recipe. Ina and friends must be smoking some pretty good stuff if four people can polish off the original dish – four of us only finished two-thirds (of the reduced portion!). I omitted the fennel, pearl onions, saffron, and Pernod the recipe originally called for. I made up my own crust recipe as well because the original one called for shortening, and that’s where I draw the line. The crust only had 4 tablespoons of butter for over a cup of flour, but after adding Greek yogurt it came out nicely. I was actually quite surprised at how deliciously flaky the crust was despite the small portion of fat.

Ingredients

  • 6 Tb. unsalted butter
  • 1 md. onion, diced
  • ¼ c. all-purpose flour
  • 1 ¼ cups good chicken stock
  • ¾ tsp. kosher salt
  • ½ tsp. paprika
  • ½ tsp. basil
  • ¼ tsp. freshly ground black pepper
  • 2 tablespoons heavy cream
  • ¾ c. large-diced potatoes (1/2 pound)
  • ¾ c. sliced asparagus
  • ¾ c. peeled, 3/4-inch-diced carrots (1-2 carrots)
  • ¾ c. peeled, 3/4-inch-diced butternut squash
  • ¼ c. minced flat-leaf parsley

For the pastry:

  • 1 ¼ c. all-purpose flour
  • ¾ tsp. kosher salt
  • ½ tsp. baking powder
  • 4 tb. unsalted butter
  • ¼ – ½ cup ice water
  • ¼ c. Greek yogurt
  • 1 egg beaten with 1 tablespoon water, for egg wash
  • Flaked sea salt and cracked black pepper

Directions

  1. Melt the butter in a large pot over medium heat. Add the onions and saute until translucent, 10 to 15 minutes. Add the flour, reduce the heat to low, and cook for 3 more minutes, stirring occasionally. Slowly add the stock, basil, paprika, salt, and pepper, and bring to a boil. Simmer for 5 more minutes, stirring occasionally. Add the heavy cream and season to taste. The sauce should be highly seasoned.
  2. Cook the potatoes in boiling salted water for 10 minutes. Lift out with a sieve. Add the asparagus, carrots, and squash to the pot and cook in the boiling water for 5 minutes. Drain well. Add the potatoes, mixed vegetables, onions, and parsley to the sauce and mix well.
  3. For the pastry, mix the flour, salt, and baking powder in a large bowl. Add the butter and mix with a pastry cutter until fat is evenly distributed. Add water, a tablespoon at a time until the dough just almost comes together. Then add in the Greek yogurt and incorporate with a fork. Wrap the dough in plastic and allow it to rest in the refrigerator for 30 minutes.
  4. Preheat the oven to 375 degrees F.
  5. Spread the vegetable mixture in a 9″ pie plate. Roll the dough out on a floured surface. Brush the outside edges of the pie platel with the egg wash, then place the dough on top. Trim the circle to 1/2-inch larger than the top of the bowl. Crimp the dough to fold over the sides, pressing it to make it stick. Brush the dough with egg wash and make 3 slits in the top. Sprinkle with sea salt and cracked pepper. Place on a baking sheet and bake for 1 hour, or until the top is golden brown and the filling is bubbling hot.

Read Full Post »

Older Posts »